Showing posts with label Mobile. Show all posts

Saturday, 8 September 2012

Secret Hack Codes For Android Mobile Phones

| |
3 comments

So in this topic you will come to know all the hidden secret codes which can be used in your Google Android phone . From these secret codes you would be able to access all those things in your Phone which are not accessible by default.

1.    *#*#4636#*#*
This Code provides information about your phone and battery. It shows following 4 menus on screen:

    Phone information
    Battery information
    Usage statistics
    Battery history

2.  *#*#7780#*#*
This code is used for a factory data reset. It will remove following things:

    Google account settings stored in your phone .
    System and application data and settings .
    Downloaded applications .

It’ll NOT remove:

    Current system software and bundled applications.
    SD card files e.g. photos, music files, etc.

NOTE: Once you apply code, you get a prompt screen asking you to click on “Reset phone” button. So you get a chance to cancel your operation.

3. *2767*3855#
This code is used for factory format. It’ll remove all files and settings including the internal memory storage. It’ll also reinstall the phone firmware.

NOTE : Once you apply this code, there is no way to cancel this operation unless you remove the battery from your phone. So THINK TWICE BEFORE APPLYING THIS CODE .

4. *#*#34971539#*#*
This code shows information about Your  Phone’s Camera .It shows 4 following options :

    Update camera firmware in image (Don’t dare try this option)
    Update camera firmware in SD card
    Get camera firmware version
    Get firmware update count

Warning : Never Use the first option as it can harm your phone’s camera and your camera will stop working . Don’t Try It .

5 . *#*#7594#*#*
This is the popular one . This code let you change the “End Call / Power” button action in your phone.By default, if you long press the button, it shows a screen asking you to select any option from Silent mode, Airplane mode and Power off.

6. *#*#273283*255*663282*#*#*
This code opens a File copy screen where you can backup your media files e.g. Images, Sound, Video and Voice memo. This is very usefull .  Isn’t it ?

7.  *#*#197328640#*#*
This code is used to enter into Service mode. You can run various tests and change settings in the service mode.

Some  Codes For WLAN, GPS and Bluetooth Test Codes:

*#*#232339#*#* OR
*#*#526#*#* OR
*#*#528#*#* – WLAN test (Use “Menu” button to start various tests)

*#*#232338#*#* – Shows WiFi MAC address

*#*#1472365#*#* – GPS test

*#*#1575#*#* – Another GPS test

*#*#232331#*#* – Bluetooth test

*#*#232337#*# – Shows Bluetooth device address

Some Codes to get Firmware version information:

*#*#4986*2650468#*#* – PDA, Phone, H/W, RFCallDate

*#*#1234#*#* – PDA and Phone

*#*#1111#*#* – FTA SW Version

*#*#2222#*#* – FTA HW Version

*#*#44336#*#* – PDA, Phone, CSC, Build Time, Changelist number

Some Codes to launch various Factory Tests:

*#*#0283#*#* – Packet Loopback

*#*#2664#*#* – Touch screen test

*#*#0673#*#* OR
*#*#0289#*#* – Melody test

*#*#3264#*#* – RAM version

*#*#2663#*#* – Touch screen version

*#*#0*#*#* – LCD test

*#*#0588#*#* – Proximity sensor test

*#*#0842#*#* – Device test (Vibration test and BackLight test)


Note :
Try all these codes at your own Risk . We’ll not be responsible for the use or misuse of this information, including loss of data or hardware damage .

Thanks For Reading

Keep Visting :- IndiCyborg
Read More

Monday, 6 August 2012

Bluetooth Hacking

| |
1 comments

Magic blue hack is Free mobile Bluetooth hacking software developed for j2me(Java S40) based  handsets. By using this Software You can Hack and Gain almost full acess of victim's Mobile. hack you can gain almost full control over the victim phone.

Installation and setup of magic blue hack is quite easy, hope you all knows how to install a software in mobile phone, you need  run this java application in Your phone
To connect to the other phone you need to run magic blue hack and search for the devices. Then select the target device you want to hack. Whats really sad about this application is that it asks the victim to accept the incoming connection, so it’s not really a hack in true sense of the word.
You can even make phone calls; put the call on hold or hang of the phone. Just enter the phone number you need to call and press the call button.

To send sms just enter the phone number of the person you want to send sms and write your text in the text box and then click the send message button. The charges for sending the sms will deducted from the hacked device.
Reading the phone book of the victim phone is also very easy but in some phones specially symbian, this feature is not working correctly and the new release of magicbluehack may solve this problem.


Despite being the intruder of privacy magic blue hack can't exactly be called as a hacking software as there is need for the victim to accept the incoming connection but hacking means bypassing the security parameters and sneak into the device without the owner even knowing about it. It should rather be put as toy software rather than hacking software.


Download Magic Blue Hack


Jar File || jad File
Read More

Saturday, 30 June 2012

Samsung Galaxy Pocket Vs Galaxy Y Budget Phones Comparison

| |
0 comments

The Samsung Galaxy Y Young S5360 is a smart phone design for the suit to your youth. The device in India is a big hit in terms of introductory Android smart phones and it’s been sold like a hot cake in town. Galaxy Y quickly hit the charts with astonishing ads shown in television where in a young girl helps a business professional to guide through directions through Google Maps on Galaxy Y Young.

Galaxy Y is available from August 2011 in India and Samsung also released Galaxy Pocket S 5300 which is another introductory smart phone lighter than Galaxy Y available from February 2012. Both these devices have achieved success and it’s chosen by many as their ultimate Android smart phone.

In this article we go through detailed comparison of Samsung Galaxy Y and Samsung Galaxy Pocket –


Table of Content

Display Comparison
Form Factor Comparison
Processor Comparison
Camera Comparison
Operating System Comparison
Storage Comparison
Network Comparison
Battery Comparison
User Interface Comparison
Price Comparison

Display Screen Comparison

Samsung Galaxy Y – 3 inches, 240 x 320 pixels resolution
Samsung Galaxy Pocket – 2.8 inches, 240 x 320 pixels resolution

Samsung Galaxy Y and Galaxy Pocket major difference is spotted in the display screen size. Both these smart phones are from the same manufacturers and Samsung has supplied it with same screen display technology provide capacitive touch screen with 256k colors display. It would see TouchWiz user interface on both the devices with touch sensitive controls.

Galaxy Y is larger of these two devices and it would see a 3 inches capacitive touchscreen display providing 240 x 320 pixels resolution at amazing 133 ppi pixel density. Galaxy Pocket would be seen with 2.8 inches capacitive touch support alongside with 240 x 320 pixels resolution with pixel density standing at 143 pixels better than Galaxy Y.


Processor Comparison

Samsung Galaxy Y – 830 Mhz ARM v6 Processor
Samsung Galaxy Pocket – 832 Mhz ARM 11 processor

Both these smart phones uses the ARM processor but the Galaxy Pocket is with the upgrade version of the processor and clock speed of both the devices is almost same at 830 Mhz. The device would be seen with Accelerometer, proximity, compass sensors.

Operating System Comparison

Samsung Galaxy Y – Android 2.3 Gingerbread OS
Samsung Galaxy Pocket – Android 2.3 Gingerbread OS

At this price tag, no Samsung powered smart phone has the latest version of Android. Both Samsung Galaxy Y and Pocket are with Android 2.3 Gingerbread operating system and rarely do you find updates available on these devices which are minor updates. Presents it’s on Android 2.3.6 version.

Both these device comes with Google Play Store access to install applications for free and paid downloads and various other free Google apps.

Memory Storage Comparison

Samsung Galaxy Y – 160 MB internal memory, micro SD card slot
Samsung Galaxy Pocket – 3 GB internal memory, micro SD card slot

When it comes to memory on smart phones, it has become a common trend to provide these smart phones with micro SD card slot which supports up to 32 GB of storage. Both Galaxy Y and Galaxy Pocket have micro SD card slot. It’s quite surprise for me to see the comparison results in the memory segment. Galaxy Y though priced Rs 500 to Rs 1,000 higher than Galaxy Pocket, it features 160 MB of internal memory storage. Galaxy Pocket has 3 GB of internal memory. The 160-MB internal memory can be easily used and for those users with this smart phone, you need to move application installed to external memory card.

Winner : Samsung Galaxy Pocket

Camera Comparison

Samsung Galaxy Y – 2 Mega pixel camera, 1600 x 1200 pixels
Samsung Galaxy Pocket – 2 Mega pixel camera, 1600 x 1200 pixels

Since both the devices are priced in the near range, Samsung has maintained same camera specifications as that seen in Galaxy Y device. Both the device have 2 mega pixel rear side camera which provides 1600 x 1200 pixel resolution and have no camera on the front side. The rear side camera comes with function of geo tagging and includes the options of video recording with QVGA quality at 15 fps speed. Accordingly to their price this is the modest specifications.

Battery Comparison

Samsung Galaxy Y – Standard battery, Li-Ion 1200 mAh
Samsung Galaxy Pocket – Standard battery, Li-Ion 1200 mAh

Galaxy Pocket comes with 1200 mAh rechargeable standard battery capable of up to 800 h (2G) / Up to 500 h (3G) standby time and up to 17 h (2G) / up to 5 h 40 min (3G) talk time respectively. Whereas on the other side Samsung has supplied the same specifications to Galaxy Y as well but this would provide different battery life as mentioned in the specifications data sheet says Up to 850 h (2G) / Up to 540 h (3G) standby time and up to 17 h (2G) / up to 6 h 20 min (3G) talk time.

So in the battery comparison, both the device performs well.

Price Comparison

Samsung Galaxy Y – Rs 7500
Samsung Galaxy Pocket – Rs 6600

Since both the devices are available in India and both are from the same manufacturers it would be nice to compare the price of these two devices. The Samsung Galaxy Y is available at 7500 Rs and Galaxy Pocket is priced at Rs 6600.


Verdict

Since both the smart phones are powered by Samsung, its just the form factor difference and remaining specifications remained almost same. Galaxy Pocket wins in the comparison of internal memory but that isn’t a major comparison parameter. So Samsung Galaxy Pocket is the ideal choice from our side and its priced Rs 800 – Rs 1000 dearer than Samsung Galaxy Y.

Read More

Saturday, 23 June 2012

LG Optimus L3 E405 Dual SIM Smart Phone – Specs & Features

| |
0 comments

Just like Samsung does it for the Galaxy series, LG does it same for their Optimus series of smartphones as they just can’t leave the word Optimus. LG during the Mobile World Congress announced L3, L5, L7 held at Barcelona in Spain Android smart phones along with Optimus 4X HD smart phoned as well. The Optimus L3, L5 and L7 have reached various countries and they are available for purchase.

The Optimus L3 E400 receives the power of dual SIM as LG adds Optimus L3 E 405 which is a dual SIM smart phone. It would be the first smart phone in the L Style of smart phones by LG Electronics. It’s been officially announced in Ukraine and it would be available starting from July 2012 at 1,500 UAH which about 150 Euros.


LG Optimus L3 E405 Smart Phone

Going through the specifications of LG Optimus L3 Dual SIM this would be seen with small 3.2 inches touchscreen display with QVGA 240 x 320 pixels resolution and it would be spotted with 800 Mhz single core processor along with 384 MB of RAM. The graphical acceleration would be supported by Adreno 200. So that’s an ideal processing speed for a smaller smart phone and it would be seen with 3.2 inches camera used for vivid picture quality and video recording at VGA quality as well. It would be seen with Android 2.3.6 Gingerbread operating system pre-installed on it. Unlikely this would not be included in the list of Android 4.0 Ice Cream Sandwich upgrade list of LG qualified smart phones though custom firmware would make it through.


LG Optimus L3 E405 is seen in various other interesting features apart from being the dual SIM supported smart phone supporting GSM + GSM capabilities. It comes with 1 GB of internal memory to store various multi media files and it would be include micro SD card slot support of up till 32 GB in size. It with built in media player which supports almost all the popular video formats. This would be seen with four touch buttons of “Menu”, “Home,” “Back” button and easy “Switching SIM-card.”

This would include all the other functions seen on the phones like Bluetooth 3.0 with EDR, Wi Fi 802.11 b/g/n and USB 2.0 High Speed. This smart phone is seen with 1540 mAH battery which would see the A GPS supporting working as the navigator.

This smart phone is available in Ukraine from July first week and it would be also be spotted in Russia as well as it makes to the official LG Russian site. As of now now price details were announced for debut in Russia and no availability dates were mentioned too. We might also see the international availability of this device if it gets among the top selling phones in Ukraine.

We hope LG Optimus L3 E405 performs very well!

Read More

Monday, 18 June 2012

How to Install Ubuntu in Any Android Phone – Tutorial

| |
0 comments

Time has arrived to taste the latest version of Ubuntu OS right on your Android smartphone. While the World is moving towards Open Source, the likes of Apple will soon have to think about this biggest threat as the number of Android activations per day are way more than that of Apple. So, making use of Android’s open sourceness, in this article we will be checking out on how you can easily install Ubuntu on your Android with the help of simple instructions.

Disclaimer: We should not be held liable for any damage caused in the process of updating your Android Phone with Ubuntu. It is very unlikely that your device will be damaged if you follow all the instructions to the point which are mentioned in procedure. We also haven’t tried porting this to all Android devices but can test the same at your own risk.


Backup all the data present in your phone with the help of below mentioned steps and not with any of the PC Suite tools as PC Suites doesn’t recognize your devices and you will have issues in restoring the data.

SMS – Use “SMS Backup & Restore app”,
Contacts – Sync with the Gmail application,
Call Log -Call Log and Restore
Images, Songs, Videos, Files – Copy to internal / External SD Card,
APN and MMS Settings – Note down from the path “Applications > Settings > Wireless and Network > Mobile Networks > Access Point Names"


Ensure that your device is left with the minimum of 60% battery charge and also you will have to make sure that the  Samsung KIES Mode is enabled , which can be enabled from the Settings option. Also, enable the USB Debugging Mode too from the path “Settings > Applications > Development > USB debugging”.


Pre Requisites:

Device needs to be Rooted & Busy Box should be installed,
A minimum of 1GHZ processor (recommended)
Android OS version should be Android Eclair 2.1 or higher
Android device should be on Custom ROM firmware and not on Stock Firmware ,
SD card with at least 3.5GB of free space for large image (2.5GB for small image)
ADB should be installed in your computer
Active Data connection on your device (Recommended 3G / Wi Fi)
Ext2 file system support
Assuming that you have followed all the mentioned instructions, you can now proceed to the next page where we have summed up a detailed guide on how to apply ubuntu OS in your Android device.
Read More

Thursday, 7 June 2012

How to Root SONY Xperia Sola Android Phone

| |
0 comments


SONY Xperia SOLA gets the rooting treatment as in the due course of this article we will be checking out on how you can root the device with a simple procedure. Please note that once you root the device, the warranty will get void and the only way with which the warranty can be reclaimed is by re applying the original stock firmware update. In the next few coming days we will be checking out on how you can install the latest ICS Custom ROM firmware, custom ROM firmwares and also the apps which need the root access which will further redefine your phone usage.

Disclaimer: We should not be held liable for any damage caused in the process of applying this rooting process in your device. It is very unlikely that your device will be damaged if you follow all the instructions to the point which are mentioned in this article.

It’s not a compulsion but its highly recommended to back up the data with the help of below mentioned steps so as to make sure that just in case if the data gets lost or corrupted, the same can be easily restored with the help of below mentioned steps.

SMS – Use “SMS Backup & Restore app”,
Contacts – Sync with the Gmail application,
Call Log - Call Log and Restore
Images, Songs, Videos, Files – Copy to internal / External SD Card,
APN and MMS Settings – Note down from the path “Applications > Settings > Wireless and Network > Mobile Networks > Access Point Names


Also, ensure that the battery charge in your Xperia SOLA is minimum of 60% to ensure that it doesn’t get turned Off. Up next, you need to ensure that the device is on the 6.0.B.1.564 firmware along with the boot loader unlock. Just in case if you haven’t unlocked the boot loader then you need to unlock the same with the help of mentioned instructions.


Also, a working fast boot will be needed in the process of this article. So, assuming that you are done with all the above mentioned steps, you can now proceed to the next section where we have summed up a detailed article on how to root the Xperia Sola smartphone.


Procedure to Root SONY Xperia SOLA:


Download the Kernel.elf from here to your computer and then save the same to the folder which has the fast boot binaries which are nothing but the fastboot.exe file.
Turn Off your phone so that it can be entered in the fast boot mode. Connect your Phone and then hold Power Down and Volume Up Key together to enter into Fast Boot mode.
Open the command prompt and enter the below mentioned command
fastboot flash boot kernel.elf


Once the above command gets processed, you need to reboot the phone for restarting the device.
Congratulations, you have now successfully rooted your SONY Xperia smartphone. Do let us know in the comments section just in case if you face any issues as we will try our level best to sort out the same.


Via
Read More

Saturday, 2 June 2012

How to Claim Broken Lost or Stolen Phones from Asurion PhoneClaim.com Service

| |
1 comments
Android smartphones support various connectivity options and have great entertainment features to enjoy on the go. This also means that as we are using our devices and carrying it them along with us everywhere, there are greater chances of losing the phone or breaking it due to any physical damage etc. With smartphones these days costing upto 1000$, it indeed is important to recover them back using a service like PhoneClaim when it has been lost, stolen or damaged. The service helps you get your smartphone back once you subscribe to one of Asurion’s PhoneClaim plans.


About Asurion PhoneClaim

With a team of over 5,000+, Asurion provides assistance, protection and claim refunds to smartphones as long as you have a Wireless Phone Protection plan active with Asurion. With this, you once your phone is broken, lost or stolen, you can get a replacement phone soon after filing a claim for your phone with Asurion within 60 days of incident. The Asurion PhoneClaim services raises a ticket which you can keep track of and also has an online and telephone customer helpline where you can call and ask your status of the claim as well.

To file an Asurion PhoneClaim Request

What do you need : An active Asurion PhoneClaim plan and filing of the request within 60 days of the incident.
Documents like Valid driver’s license, Student ID, Passport etc.  Check out the exact list of documents you need to submit here as it varies from carrier to carrier.
Carriers supported : Alltel, AT&T, Cellular One, Cellular One San Luis Obispo, Centennial Puerto Rico, Centennial Wireless, Clear, Clearwire, Comcast, Dobson Cellular, Edge Wireless, MetroPCS, nTelos, Palm, Rural Cellular, Sprint, Time Warner Cable, T-Mobile, TracFone, Verizon Wireless.
How to file Asurion PhoneClaim Request
  1. Go to Asurion Phone Claim website [link]
  2. Click on the “Claim Now” button
  3. Follow instructions which appear on the screen where you have to enter your PhoneClaim plan details and details of the incident.
  4. You will have to enter your incident details, device details, shipping address for your new device etc.
  5. Once these are entered and confirmed, you will get a ticket number which can be followed up by you as and when needed.
The Asurion PhoneClaim plan seems to be quite a good option for those using the above mentioned carriers and smartphones. We feel it is a good step which smartphone users can take. Do let us know in the comments if you have used or been benefited from this.


Read More

Samsung Galaxy S III Launched – 4.8″ 720p Super AMOLED Display, 8MP Camera – Specs & Features

| |
0 comments

The Next Galaxy, i.e. the Samsung Galaxy S III is finally into the scene. Thousands, literally thousands of false news kept the readers busy on just dreaming about what would be possible specifications of the Galaxy S III, but the truth has come out. The Galaxy S III rocks, its truly superb and keeps everything else at bay today. And no, its not the #NextGalaxy but the Galaxy S III would be the official name of the phone.

Check how Samsung Transformed to the best every year, from the Samsung Galaxy S in 2010 to the S III this year.
 
Here are a few features that we have found out, as the event goes on live right now:

4.8-inch 720p Super AMOLED Display
8MP rear camera
1.9MP front camera with “face recognition”
2100mAh Battery
Android 4.0 Ice Cream Sandwich OS
S Voice for the Samsung Galaxy S III is what the Siri app for the iPhone 4S is. It recognizes your voice, listens to your command and acts the way you want it to.

Here are some of the best features of the Galaxy S III:

Smart Stay – The front camera of the phone recognizes whether you are actively looking at the phone screen and using it, and until that the screen is turned on. If the camera doesn’t detect your viewing, the screen would turn off automatically.


Direct call – This feature is helpful when you are trying to text message someone but in the end decide not to do that and call the same person. For making the call, you just need to lift the phone towards your face or ear and the call would be dialed automatically.

S Voice – We talked with a bit of over excitement here about this feature, and compared it with the Siri for iPhone but actually it isn’t. It listens to your commands, but a very few ones. Searching using the Google search, turning the camera on, calling someone, checking the weather etc. is what all is done listening to your commands.


S Beam – The Near Field Communication transfer is taken to the next level from the standard ICS based NFC that came earlier. The tapping and phone-to-phone transfer is possible in a faster and better way.
Burst Shot (Best Photo) – 20 captures in a super-fast mode, and all are displayed at once and out of them you may select the best shot and all the other are deleted. This is nothing new, as the HTC One X Camera already had a better way, capturing 99 pictures in the same burst mode.


Wireless charging is what we have heard of, but aren’t sure how it works until we directly test it out.

May 29th is the date when the Samsung Galaxy S III would be actually available in the market in the West, and in the Eastern nations like India, the market would get it for sale in June.

We are still updating.

Samsung Galaxy S III official photos:


After the break: The previous news, rumors and talk about the Galaxy S III. Whatever has just been released, is updated above.


How many of you have already bought a Samsung Galaxy S I9000 mobile phone and are confused on should to upgrade to S2 or wait for something better? Here is a good news for all of you because Samsung’s mobile division president has hinted that the Galaxy S3 is soon going to be launched with some awesome configuration. In an age where Samsung has ruled the Android Market with its “Galaxy” Series signature after the hit and hot selling success of Galaxy S as well as Galaxy S2 phone, time has now come to speculate about the Samsung Galaxy S3 handset which is already in the making for making itself available in the year 2012.


Galaxy S III GT-I9300 appears on Official Website – Launch Under Review
Samsung Galaxy S3 Confirmed Specs & Release Date by Insider
Samsung President shows Galaxy S3 at CES Press Conference – Video
Samsung Galaxy S III Phone Design looks more like Galaxy Tab
Samsung to Launch Cheaper Galaxy S3 with 8GB & 12 Mp Camera at MWC
Samsung Galaxy S III GT-I9500 Camera Sample Photo Leaked
Samsung Galaxy S III to be announced at MWC 2012 with Galaxy S 3D
Samsung Galaxy S3 Leaked Picture, Specifications – Launch at MWC 2012
Samsung Galaxy S3 to run on Exynos 4412 Quad Core ARM Cortex Processor
Samsung Galaxy S3 to get 16MP Camera & S5K2P1 CMOS Sensor
First of all Samsung is trying to beat all the Apple Records in terms of sales and the Galaxy S2 has helped them in doing the best by bringing Samsung into Number #2 top mobiles selling company. If you are already having a pretty good mobile which you are not yet planning to sell away or upgrade then its suggested to wait for around a years time for the Galaxy S3 or the Galaxy 3D models. While the lawyers of both Samsung and Apple are busy in fighting it out for the supremacy in the technology space, the Engineering units of both are busy in creating an unforgettable and powerful smart phone with iPhone5 and Samsung Galaxy S3.

We have very less details on this handset as of now but Apple would of course get the first preview because of the ongoing legal battle between both the companies and we should expect some actual snaps of the phone by this year end. It is being speculated that the model number for the Samsung Galaxy s3 will be GT I9300.

Going with the specifications its expected to obviously be an upgrade of the Galaxy S2 with the Camera being 12Mp, quad-core processor, a super-bright AMOLED 3D screen with NFC, 4G Supported device etc. to name a few.  Especially when the HTC One X, Ascend P1 D and Meizu Mx Quad Core phones are out, it will be have to be atleast 1.5 Ghz quad core processor Samsung Exynos CPU. Also its expected that this would be the first phone which would feature the Ice Cream Sandwich. Also the screen size should be around 4.5″ which beats the LG Optimus 3D and also offer you with 4G connectivity support. Lets wait and watch how all this goes and when the phone would be actually be available to you and then you can decide if its worth upgrading your current phone or not. It is also said that this phone will be launched in the first half of FY’12. So, just in case if you have not purchased the last phone from the Samsung which is the Samsung Galaxy S2 then its probably just time to wait as you can buy an all new and probably the World’s best would be smart phone, the Samsung Galaxy S3.

Undoubtedly, Samsung is betting very big on this handset as its in no mood to disclose things about this Samsung Galaxy S3 anything Officially. This smart phone is going to be the World’s slimmest smart phone ever which was disclosed by our close source from Samsung. Another most important feature which is speculated is that it will be having the lowest SAR value which is basically the radiation emitted by the phone. With rising health concerns around the Globe and people’s preference on talking on the phone more than meeting personally, its very important ensure that you have a smart phone which has the lowest SAR Level. With higher SAR levels, the phone tends to get heated up which can in turn damage the brain. Considering the fact that by 2012, the 4G will turn into reality and almost maximum countries will be witnessing the 4G, this support also looks possible. So, in all if you have a look at some of the core features or say USPs then these will be 12MP camera with probably CMOS Sensor with it.

The below picture was recently popped up on the web claiming that the Samsung Galaxy S III would be launched world wide in May 2012. Hope these rumors are true and we really get a chance to see this device.


Highlight Features of Samsung Galaxy S3:

NFC (Near Field Communication) Chip,
3rd generation Super AMOLED 3D Screen,
Ultra Low SAR Levels,
Blazing fast Speeds with Quad Core Processor,
Probable 4G Supported Phone,
Slimmest Smart Phone ever
Am sure after reading this whole article you might just still want to know on by when this phone will be launching, for which we just can say one thing, stay tuned to Androidadvices.com as we will be updating this article as in when we get any inputs from our sources at SAMSUNG etc. We still haven’t added any concept photos of Samsung Galaxy S3 as of now  in this article, but as soon as we get any we will surely update this article with the same.

Galaxy S III would be priced at Rs 43,180 as the MRP price on the box and to get discount in the form of assured gift worth Rs 1500. You can purchase this handset at Samsung India eStore online.


Read More

Wednesday, 23 May 2012

How to Root and add CWM to Samsung Galaxy S2 Running Android 2.3.6 Build XWKL1 Hack

| |
0 comments

If you’ve updated your Samsung Galaxy S2 GT-I9100 with the official Samsung-released firmware for Android 2.3.6 Gingerbread build XWKL1 and have lost your root access along the way, there’s a way for you to get it back.
Firmware XWKL1 for the Galaxy S2, said to be an incremental firmware update officially from Samsung, reportedly provides better battery life than earlier firmware updates.  For this reason, many folks have updated their Galaxy S2 to the said firmware and took an extra step: rooting the phone in order to further customize it.
In this guide, you will learn how to root your Samsung Galaxy S2 GT-I9100 after updating it to firmware XWKL1 of Android 2.3.6 Gingerbread.

Requirements

  • Samsung Galaxy S2 GT-I9100 with Android 2.3.6 Gingerbread firmware XWKL1 installed
  • Back up all your personal phone data (e.g., contacts, SMS, files, photos, Internet settings, MMS, etc.).  Do not use Samsung KIES in creating a back-up. Your rooted phone may be incompatible with Samsung KIES.
  • Charge your battery to at least 60% power (full charge recommended) to keep your device running throughout the rooting procedure.
  • Disable all system tools such as Samsung KIES, firewall programs, and antivirus software. These tools might affect or hinder the rooting process on your mobile device.

Warnings

These instructions are for the Samsung Galaxy S2 GT-I9100.  Do not try these on another variant of the Galaxy S2 (such as the GT-I9100G).
Do not attempt to use this guide if your Galaxy S2 is not running Android 2.3.6 Gingerbread firmware version XWKL1.  Otherwise, you could brick your phone.
We will not be held responsible for any damage arising from the use of this rooting instructions. Root your device at your own risk.

Instructions

  1. Get the XWKL1 root package from here.
  2. Extract the RAR archive’s contents into a folder on your computer.  Use WinRAR or other RAR extraction software.
  3. Go to the folder containing the extracted files and launch the Odin3_v1.0 program.
  4. Switch off your Samsung Galaxy S2.
  5. Press and hold the Volume Down key and Home button (middle key) simultaneously, while tapping the Power button to reboot your phone into Download Mode.
  6. Once in download mode, connect your mobile device to the computer using USB cable.
  7. Go back to Odin3 and click the “PDA” tab. From there, select the file “CF-Root-SGS2_XW_INU_KL1-v5.0-CWM5.tar” you got from the extracted files.
  8. Under Option in Odin3, make sure only “Auto Reboot” and “F. Reset Time” are checked.  Leave the other options unchecked.
  9. Click the “Start” button in Odin3 to begin the rooting process. This will take a few minutes.
  10. When your phone has been successfully rooted, your mobile device will automatically reboot.
  11. Disconnect your phone from the computer once the homescreen appears on your phone.
  12. Switch off your mobile phone.
  13. Reboot your mobile device into Recovery Mode by pressing the Volume Up key, Home key (middle button), and Power button simultaneously.
  14. While in Recovery mode, select “Wipe data/factory reset” and confirm the action on the next screen.
  15. Select “Wipe Cache partition” and confirm the action on the next screen.
  16. Go back to the main menu and select “reboot system now” to restart your phone.
You have successfully rooted your Samsung Galaxy S2 I9100 running firmware XWKL1 of Android 2.3.6 Gingerbread. You will also notice that ClockworkMod Recovery and Superuser app have been installed on your phone (a reliable indicator if you were successful in rooting your mobile device).

Read More

Root the Samsung Captivate I897 Hacks

| |
0 comments

Are you itching to gain root access on your Samsung Captivate? If you’ve recently updated to Android 2.3.3 Gingerbread UCKF1 firmware, rooting your Samsung Captivate is no problem at all. XDA Developers forum member designgears brings us an easy kernel-based solution. The kernel may be rather basic but it gives you root access with init.d support. The kernel is also insecure, hence running adb as root.
If you’re new to the world of rooting, have no fear. Though it may not be a one-click solution, even the most inexperienced of Android users can make this work as long as you’ve got Odin. Just follow our instructions and you’ll be set.

Caution

It’s important to note that this rooting procedure will work only for the Samsung Captivate I897. It will not work on the Samsung Captivate Glide or other phone models so please do not attempt to use this method to root incompatible phones.
Also, we take no responsibility over any damage or disaster that occurs to you or your phone because of your use of this guide. Use the information at your own risk.

Requirements

If you’re excited to gain root access to your Samsung Captivate, you’re going to need a few things:
  • Samsung Captivate with Android 2.3.3 Gingerbread UCKF1 firmware
  • A computer running Windows
  • Make sure that your Samsung Captivate’s battery is fully charged. This prevents the phone from shutting off in the middle of the rooting process.
  • Back up any important data on your phone, just in case data will be lost or corrupted during the rooting process.
  • Make sure that USB Debugging has been enabled on your Samsung Captivate. You can do this through “Settings > Application > Development.” Make sure that USB Debugging has been checked.
  • Samsung USB drivers installed. Download USB drivers for 32-bit Windows or 64-bit Windows
  • I897UCKF1 – Auto root kernel
  • Odin3 v1.8.5 — Get it here.

Instructions

Once you have everything, you can now root your Samsung Captivate I897:
  1. Download Odin3 v1.8.5 from the link above.  Save it to your computer.
  2. Download the auto root kernel to your computer. See the link above.
  3. Turn off your Samsung Captivate.
  4. Boot your Samsung Captivate into download mode. You can do this by holding down the Volume Down key while pressing the Power button.
  5. Run Odin3 on your computer.
  6. Click on the PDA button in Odin3 and navigate to where the I897UCKF1 auto root kernel is located.
  7. Choose the I897UCKF1 auto root kernel TAR file.
  8. In the Option section, make sure only Auto Reboot and F. Reset time are checked.  The other options should not be checked.
  9. Connect your phone to the computer via the USB Cable.
  10. If you’ve installed all the drivers correctly, you’ll see the ID:COM section in the upper left of the Odin3 window turn bright yellow.
    • If it does not turn yellow, disconnect your phone and install the appropriate device drivers. Try again.
  11. With the kernel in place, hit the START button. Odin3 will start flashing the kernel.
  12. Once the kernel has finished flashing, your phone will reboot.
  13. Wait for your phone to completely boot up before disconnecting it from the computer.
Your Samsung Captivate I897 is now rooted. You can now enjoy root access on your phone, as well as the possibility of flashing custom ROMs to your heart’s desire.

Read More

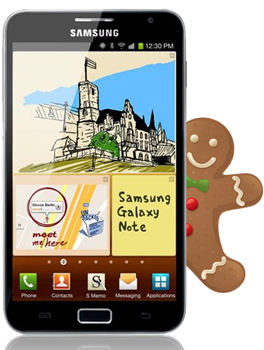
Update Samsung Galaxy Note GT-N7000 to Android 2.3.6 Build XXLA6 Hacks

| |
0 comments

While everyone might be going nuts over Ice Cream Sandwich, there’s nothing quite as comforting for Samsung Galaxy Note GT-N7000 users like Gingerbread. Users can get their new dose of Gingerbread from the new official Android 2.3.6 Gingerbread firmware build XXLA6. Though the firmware hasn’t been officially launched yet internationally, Android users in Europe have reported the firmware update to be stable. The said update reportedly carries fixes for some camera issues and some issues with S Note.
Applying this update is fast and easy. Even the most novice of Android users can do it.  Applying this update will not root your device in any manner, thus it will not revoke your warranty.
If you have already rooted their Samsung Galaxy Note GT-N7000 though, the update will cause you to lose your root access and your warranty will be restored.

Requirements

If you’re getting excited to apply this update, you’ll need to quell your excitement because you’ll need a few things before you can proceed to the update process:
  • Make sure to create a backup of the data on your Samsung Galaxy Note GT-N7000. Applying this update may corrupt or erase important information.
  • Make sure that your Samsung Galaxy Note GT-N7000′s battery is fully charged. This will prevent the device from shutting off in the middle of the update process.
  • Check if USB Debugging has been enabled on your Samsung Galaxy Note GT-N7000. You can do this through “Settings > Applications > Development > USB Debugging.”
  • Make sure that all the appropriate Samsung Galaxy Note GT-N7000 drivers have been updated and installed on your computer. This is very important.
  • Android 2.3.6 Gingerbread firmware XXLA6. (The package also includes Odin3 v1.81.)

Instructions

Here’s how to update your Samsung Galaxy Note GT-N7000 to Android 2.3.6 firmware XXLA6:
  1. Download the XXLA6 firmware package from the link provided above.  Save the file to your computer.
  2. Extract the contents of the package into a folder on your computer. Make sure that you see “N7000XXLA6_N7000OXXLA1_N7000XXLA4_HOME.tar.md5″ among the extracted files.
  3. Turn off your Samsung Galaxy Note GT-N7000.
  4. On your computer, double click and launch Odin3. It’s inside the folder where you extracted the ZIP package to.
  5. Boot your Samsung GT-N7000 into download mode. You can do this by pressing the Volume Down and the OK buttons while pressing the Power button.
  6. Once the device is in Download Mode, connect your Samsung Galaxy Note GT-N7000 to your computer.
  7. If all the appropriate device drivers had been installed earlier, the ID:COM section of Odin3 should light up in bright yellow.
    • If the ID:COM section does not light up, disconnect the phone and go through “Settings > Wireless and Networks > USB Settings > Samsung KIES option”. Try connecting the phone again to your computer.
  8. Click on the PDA button in Odin3.  In the browse dialog, select the “N7000XXLA6_N7000OXXLA1_N7000XXLA4_HOME.tar.md5″ file.
  9. In the Option section in Odin3, make sure only “Auto Reboot” and “F. Reset Time” are checked.  Leave the other options not checked.
  10. Click Start in the Odin3 window.
  11. Your firmware will start installing and in a few minutes, it should have successfully finished.  The device will also automatically reboot.  Disconnect the Galaxy Note from the computer when the homescreen loads after rebooting.
  12. Turn off your Galaxy Note again.
  13. Reboot the Galaxy Note to recovery mode by holding down the Volume Up and OK buttons as you press the Power button.
  14. From the recovery menu, select “Wipe data/factory reset” and confirm the operation on the next screen.
  15. Select “Wipe cache partition” from the options and confirm the operation on the next screen.
  16. Return to the recovery’s main menu.
  17. Select “Reboot system now.”
Your Samsung Galaxy Note GT-N7000 should reboot automatically and once you see the home screen
again, you’ll now be running on Android 2.3.6 firmware build XXLA6.

Read More

AOSP Android 4.0 ROM for Samsung Galaxy S2 – KOUD AOSP Hack

| |
0 comments

If you want to try it, just follow the simple steps below.

Note:
  • Make sure that your device battery is charge at least 60%
  • Backup your device data into your computer.
  • Turn on USB Debugging, on your homescreen tap Menu> Settings> Application> Development. Then, make sure that USB debugging is checked.

Requirements:
  • Samsung Galaxy S2 with CWM recovery
  • USB Data Cable
  • Computer
  1. First, download the koud-AOSP-4.0.3_v21.03.12.zip file on your computer.
  2. Then, connect your device to the computer using your USB Data Cable.
  3. Next, copy the zip file you downloaded earlier to the root directory of your SD card.
  4. Disconnect your device to the computer.
  5. turn off your device.
  6. Go to Clockworkmod recovery.Press and hold the Volume UP+Home+Power. Phone will boot into CWM recovery.
  7. Once you’re in the recovery, do a nandroid backup by selecting backup> backup and restore> then backup to start saving your old ROM. (This will make a full backup of your existing ROM, and save it to the SD card. You can restore from this backup, if something gets messed up with the installation.)
  8. Now do a full wipe by selecting Mount and Storage then wipe the following:
    • Format System
    • Format Data
    • Format Cache
    • Go back to main menu and select advance then wipe dalvik-cache.
  9. From the main menu select install zip from Sd card> choose zip from Sd card>then select the koud-AOSP-4.0.3_v21.03.12.zip to start flashing the AOSP ROM (ICS).
  10. Go back to main menu and select Reboot System now.
You have successfully updated your phone to AOKP ROM, to install the Google apps, just follow the simple steps below.
  1. Download the gapps-ics-20120224-signed.zip on your computer.
  2. Then, connect your phone to the computer using your USB Data Cable
  3. Next, copy the gapps-ics-20120224-signed.zip to the root directory of your SD card.
  4. Disconnect your phone to the computer.
  5. Turn off your phone.
  6. Go to recovery mode.
  7. From the recovery main menu select install zip from Sd card> choose zip from Sd card> then select the gapps-ics-20120224-signed.zip to start flashing the Google Apps.
  8. Go back to main menu and select Reboot System now.
You have successfully flashed the AOSP ROM on your Samsung Galaxy S2.
Read More

Receive all updates via Facebook. Just Click the Like Button Below

?

You can also receive Free Email Updates:

Powered By IndiCyborg